Sunday, December 6, 2009

Snow Storm and a Decorated Tree

We had our first winter snow storm this weekend. It started Friday, and come Saturday morning, we were SNOWED IN!!! Literally...

Cory went to leave for work around 5am (sucks.. I know...) and then shortly after, I got a call from him, asking me to come rescue him down the street. He was stuck, and needed my help digging him out.
So, against my better judgement, I threw on some sweats, and jumped in the SUV to "Rescue" him....Unfortunately, I barely made it past our house before I got stuck.... GOING AROUND THE CORNER!!!! So I got out, and ran around the block, to find him. Freezing cold, half asleep!!!

You see, we live in a brand new area, and the road leading into our block, has absolutely no houses, or trees, or anything on it..... so there was nothing blocking all the snow that was blowing around. Since he was the first to leave, there were no tracks. The snow was also up to our knees. His car literally got hung up on the snow. The whole underside of the car was packed full of snow!!!

Despite our best efforts, we couldn't get it out... until our neighbour happened to come out ( he had to get his gf out as well. It took forever, but we got Cory out, and then my car back in front of the house. I also made the decision that I was not going to leave the house until the city plowed the roads....
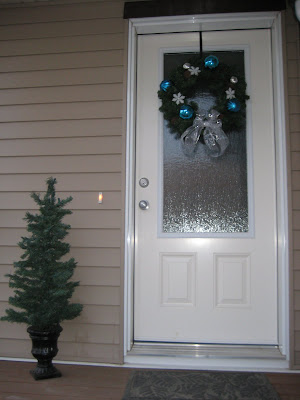
Instead I did this:
Looks really great all aglow. I was a little torn on these blue garland lights at first, since the ornaments are teal and turquoise, but it grew on me...

I was upset we didn't have the tree infront of the window, or in our case, door. But the star lights curatin from Ikea a few years back, was a good compromise!!


What's glowing under our tree you ask? I'll give you a better peek at that, and some more detail shots tomorrow ( the camera died mid-photo shoot!)


** The rest of the house.. is still a work in progress. Especially, since I am forgoing all the red and green this year! More to come!**

Thursday, December 3, 2009

Christmas Wreath.. take 2 (this time with photos!)

Sorry, this took a lot longer to re-post than I imagined it would...

So, here's the scoop again on our wreath:
I did one up last year, and hated it! In fact, I don't even have one single picture of it. I decided very early on, that I would be re-doing it this year. Since I also decided to change all the interior decor colors.... I figured it would be good if the wreath set the tone for the interior, which was going to be all teal, silver and white.
So last weekend, I tore the old one apart, and created this new one. ( It still needs slight tweaking to space things out better... I'll get to that on Saturday!!)
I simply removed the old (mostly red) ornaments and bow. I had already wired on pinecones last year ( it is MY belief that wreaths MUST have pinecones!). The HUGE teal balls were from Walmart. The silver balls are from Dollarama, as are the litle snowflakes.
I thought I didn't have any ribbon in my stash... but I had bought some ribbon ( wired silver organza with a glittered damask pattern) for another project, and it worked perfectly!
Here's the porch so far.... there's another matching tree down on one of the steps... I have to figure out where I am putting them!

I'm really not loving the wreath against the glass... we actually selected another door when we built. But when we realized how dark the entrance was... we switched back to this one!

The bow looks a lot better in person!! Very full... I guess the sheerness of the ribbon with my flash made it look silly here!

Anyhow, when I was finished I wasn't sure if I loved it or hated it....

But now, it's been there a week, and I like it. I do need to move some stuff around the space it out better, and that will come this weekend!

If you have any other suggestions, I'd love to hear them!!

Monday, November 30, 2009

Sarah's Holiday Party - Review


I was uber excited last week when I saw the preview for "Sarah' s Holiday Party", hosted by the wonderful Sarah Richardson, and her helped Tommy Smythe. I set the DVR to record it yesterday afternoon!

When I went to watch it, around 4.... I found that something had happened, and it had not recorded :( So I searched for the next viewing, and set it to tape again. Thankfully, it worked, and I watched it when Cory fell asleep.

I have to say though, I was a little disappointed at first, because I thought the hour long segment was the same as what's I'd seen in last year's Canadian House & Home Magazine. Upon closer inspection, they were different, so I was glad!!

I was however, excited to hear about all her prep work! It was pretty cool seeing how a Canadian Design Icon gets ready for her big fetes.

They tackled everything : decorating indoors and out, making stockings from scratch, trimming the tree, baking yummy treats, creating an Advent tree, jazzing up cocktail napkins, shopping for groceries, and setting up your buffet.

While the Holiday decor style Ms. Richardson chose for her own home was definetly not my taste... more Easter/Spring colors than Christmas if you ask me... but she had some handy tips and tricks.

Jazzing up plain cocktail napkins

Since Sarah's party had a guest list of 200, it can get a little pricey to rent linens, and I'm doubting anyone has that many matching ones.... So she uses paper cocktail ones. In order to dress them up a bit, she embosses hers!!

She invested in a "seal", like what Corporations use to stamp legal documents, which she said cost about $125.00 (still a bit much for my budget), and had it customized with her and her husband Alexander's names around a "Y" for his last name (and her personal last name).
*Very cute idea! Would a stamping embosser work??

Tree Trimming tips:

While Sarah's tree-style is much different than mine, she had 2 good tips:

~ Have the same person place all balls of one color, to make sure they are responsible for proper and even disbursement. (As we saw, this method goes completely out the window, when children are helping )

~ Place any metallic or reflective ornaments nearer the inside of the tree, which will help to reflect the lights out.

Making Stockings:
One thing Sarah mentioned, that I was not aware of, is that cutting felt with Pinking Shears, ensures that it will not fray!!! Did NOT know that. I'm off to buy a pair myself tonight!
What's next for Sarah and gang?
Season 3 of Sarah's House airs March 2010!!!! A new show, Sarah 101 starts filiming in January, and they hope to have Sarah's House Season 4 in early 2011!!
Photo Credit: Canadian House & Home
**THIS WAS NOT FROM THE EPISODE, BUT LAST YEAR'S FEATURE OF HER HOME!!

Wreath post... edited.

I removed this morning's post, when I realized there were no photos associated with it... not sure what happened....

I'll re-post when I get home tonight.

In the meantime, might as well fill you in on tonight's plan: Starting my Christmas stockings!

I have to make a quick stop on the way home for some additional fabric (since I got a great tip last night...) and then hopefully, I can get started!

Saturday, November 28, 2009

Cute Christmas Gift Tags

Last night, Cory and I got very productive! While waiting for friends to finish dinner and head over, he headed to the garage to work on a project for me, and I headed upstairs to get crafty!

On Friday, while cleaning my desk at work, in preparation for our big office move. I came across these cute, glittery snowman die-cuts. Not sure why we had them, but there were 12 of them, and no one seemed to need them, so into my bag they went.

I wasn't entirely sure what I was going to use them for until I got home! They were the perfect size for gift tags!

So tonight, I got out my handy little punch to put a tiny little hole in his hat. Then looped through some linen thread, leaving the ends long, so I could attach them to the gift's ribbon!


In my head, I really wanted these to look professional, so I wanted a great little greeting. I kept saying to Cory, "shoot, I need a little to and from stamp".... then it dawned on me.....

I HAD ONE!!


So I raced over to the stamp drawer, and rifled through a few sets before I found it! PERFECT!!

I used Staz-on to stamp the greeting. Cory was the smart one who suggested I move the stamp over a bit to leave room for writing the names in!!


Now, they are exactly what I was envisioning! I can't wait to buy and wrap the first gifts, so I can use these!!!

Friday, November 27, 2009

just an everday posts

Nothing homey to report today. We weren't home last night to work on anything anyhow...my company Christmas party was last night.

I have however received promise from Cory that he will do his handy-man part and work on a new project for me tonight.
It shouldn't take too long, but he's never done it before... And it could potentially be dangerous, so i'm heading off to the gym lol.
It's a Christmas decoration that a friend of ours makes, i'm gonna knock it off!

But that's not all! In addition to that, I've got a massage scheduled for tomorrow, and we have a date to get started on Christmas decorating this weekend! December 1st is usually my timeline, but since it's midweek this year, and our weekends are pretty full after this, it only made sense to start a few days early!

I've got a new theme and all new lights and decorations this year, so i'm eager to see how things will turn out, and how I fix them when I realize I hate them...
The camera is charged and i'm poised to take tons of pics!

Thursday, November 26, 2009

Hip-hip-Hooray!!! - A Coffee Table Victory!

I am beyond pleased to finally show some (crappy) photos of the finished coffee table!!
We brought it in last night, and were just getting it acclimated to the heat, since it's been in the garage for quite some (cold) time, so it's not staged properly yet.... But we're pleased with how the color turned out (despite the washed out, less than dark color it appears when the flash is on...).
Here's a little backstory on the tables, in case you've forgotten since it took so long to finish... or if you're a first-time visitor.

Friends of ours were getting rid of the set ( 1 coffee and 2 end tables) when they moved into their new home. We were offered them, and I originally declined because:

a.) I didn't want to seem like a charity case

b.) they weren't really our style

c.) they were the wrong color

d.) I didn't think we needed them


After some quick thinking, I recanted my decision and said we'd pick them up the next day! I knew with some TLC, they could work. Plus, we were moving soon to a house with a basement... we'd need something, at least for the interim.


Here's what they looked like when we brought them home (glass tops removed for storage):


They ended up working fine for the meantime, in our upstairs loft.

However, when we moved, I fully intended on them going in the basement until we decided to finish the space and buy new stuff.... until we moved in and found our current table, for the wide room. So the end tables went to the basement for the time being, and the coffee table found a new (temporary) home as our coffee table. The color of the wood was not working for me, so I tried masking the "orange" tones of the wood, by placing a fabric-wrapped canvas on the lower shelf, a few hours before a big party:


It certainly worked, and served a purpose. Plus, a ton of people commented on the table, and the neat artwork on it ( my canvas). In fact, everyone thought it was custom-made or even something that came with the table! But, I couldn't stand the glaring wood tone difference. I wanted something that would blend, so the table would just disappear.

So, after months of my begging Cory to sand it down for me, he finally did:

I was a little worried. Apparently, the table was not solid wood - the shelf had just a veneer! Plus, in lieu of using an actual sander, he used an attachment for his drill, so it wasn't smooth looking....

But, after 2 coats of Minwax in Ebony, I am pleased to say, I am very happy with how it turned out. Aside from some touch-ups I need to do on a few drips that went un-noticed in the dark garage, we're good to go!

The flash is on in this pic, so it made the table look a lot lighter. It actually matches the floors really well!

Hopefully, despite the crappy pics, taken at night, in poor lighting, with my poor skills... you can see it's such a big improvement over the previous color.

Please know, the flash made the wood look very splotchy and light, in reality, it's not. Otherwise, I would have been too ashamed and not posted it!!

I'll post some good photos, hopefully on the weekend, when I am able to get a shot during daylight!