Tuesday, March 9, 2010

Fantastic Finds in Unexpected Places

This past weekend, while out searching for some new jeans, I hit up Superstore of all places.  Yes, the grocery store.  What can I say? I'm in-between sizes right now and refuse to spend a ton on jeans that (hopefully) won't fit in a few months! Plus their Joe-brand stuff is pretty cheap!

Well, not only did I get 2 pairs of cute jeans at $20 each, I also scored these beauties for my master bath:


They are GORGEOUS.
They are great quality.
They were 2 / $20!!!!!  FULL-SIZED BATHSHEETS!!!

I'm not a big buyer of towels or linens for that matter.  Infact, I usually only buy them when I've received a gift card, and since they're gifts, I usually spend a bit more and treat myself.

I can't wait to start using them.

Finally Found it!

Since I was heading out on Sunday to get more paint and primer for the bamboo stools, I figured I would do a little "browsing".  I had no intentions of buying anything, but it turned out to be a good day for looking.

I ended up finding the right sized foam to be able to finish the ottoman.  YAY!!  Now, I just have to sew the fabric for the base and staple it all together. 
Looks like I was not the only one who was happy with my find:

He unrolled it at the top of the stairs and took a nap!

Guess that means I will be working all week on finishing up this baby:

Reveal coming soon!

Sunday, March 7, 2010

random heres and theres

It's another beautiful day outside and I feel that it would really be a waste to not get outside a little bit, even if that's just some driving around.  I had plans to hit the gym, but I'm not feeling so good, so I'll start fresh tomorrow!

Here's what I've been up to:

These beautiful carnations are sitting on my dining table right now.  (excuse the wrinkled tablecloth, the cat jumped up and the whole thing shifted as  I was taking the photo!) I always feel bad cutting down long stems, but I LOVE the way their ruffled heads fill out the top of the vase!

Painting has been taking shape.  The lamp got another coat today, but I am thinking since it's quite detailed, I may have to resort to using a brush afterall, it's just not turning out quite right...

The bamboo stool got another coat of primer, until I ran out.  It is sure drinking the stuff up.  Off to buy some more cans!

This stool is still sitting in it's original state.  It needs some repairs:
The cane has come unravelled in this corner.
There's also a bamboo area that has broken and needs some gluing before I start!

I am also hoping that Cory can help me eleviate the above problem.  I am soooo sick of having one teeny tiny towel bar for both of us to store our bath towels on.  We use big bath sheets that are far too big on the rod, so they overlap and never fully dry.  YUCK!!


I hope these babies can help us out instead.

Anyhow, I am off to do some shopping.  Hope your weekend was lovely!

Saturday, March 6, 2010

Spring Wreath Reveal

It's a gorgeous spring-like day here today, so I figured it would be the prefect to reveal the new wreath!

As I stated in my last post, I fell for 2 great wreaths, but it was the one at Living with Lindsay that I thought best exemplified spring.  Plus I really have a thing for birds, eggs and nests, so it was perfect.

My eggs didn't turn out quite as I hoped they would, with that perfedct mottled quail's egg texture, but I love how the base colors turned out, so I am alright with that.  Plus, we get few visitors, so it's more for Cory and I than anyone else!

Anyhow, here's a brief description of how I made the wreath, and a cost breakdown:

Supplies
~ grapevine wreath form  $3.99 (Michaels)
~ 2 packages of large plastic eggs; 1 package small plastic eggs ( I tried to choose the most muted colors) $1.00 (Dollarama)
~ white spray primer (Walmart)
~ white spray paint (Walmart; already had)
~ Antique white acrylic paint (Dollarama
~ Greyish Blue acrylic paint ( I used a color called Blue Wisp mixed with Light Colonial Blue; different brands (Dollarama; already had)
~ 2 foam paint brushes
~ cheap skinny dollar store paint brushes (for mottling)
~ floral wire
~ scissors/wire snips


How To:

1. My eggs were attached, so I opedned them, lay them flat and gave them all 2 coats of white primer, especially for the more brightly colored eggs
2. Once dry them came inside and I coated half with Antique White acrylic, the other half with my Blue Wisp/Light Colonial Blue  mixture for a perfect bluey-grey color..  Each egg got 2 coats, to ensure proper coverage
3. Then it was time for the mottling.  I used a cheapie brush to paint splatter the blue eggs with Antique white and a light brown I had (Country Maple).  The Antique white eggs got brown and grey splatter.  Overall, I am not too happy with my splatter effect, but what can you do?  Maybe you'll have better luck.
4. After the eggs were dry, it was time to hang them.  Some of my eggs had holes at each end, some didn't.  It was easy enough to poke holes on each end.  I used a seam ripper cause that's what I had available.
5.  Then I cut stips of floral wire and poked them thru each hole, from the inside.  In hindsight, I wish I had another color wire than green, as I hate being able to see it against the brown wreath.  But I used what I had.
6.  Once your wire is pulled thru, just close your egg up.  Then you can simply wrap the wire around the branches wherever you want your eggs.  It's easiest to use the big eggs first, and then add in some little eggs.
** I hang my wreath on it's hanger, so that I can see how it looks when I step away.  This helps to determine where I have blank spaces, etc.

7. If you wanted to, you could add some feathers tucked in among the branches for a real, "NEST"  feel.  I had thought to do so, but didn't buy the feathers afterall, whoops! 
Since I was using a metal wreath hanger, there was no need for a ribbon, but you could add it as a hanger if you chose to do so.
I actually went with a lot less eggs than I intended.  I didn't want it to look TOO MUCH!  I'm pretty happy with it, I must say.  It's just the right touch for these gorgeous days.

Unfortunately, the scene surrounding my front porch, looks like this right now:
I am currently on the search for something to sit to the left of the door. 
Little bench?  Plant stand? 
Any ideas?

Saturday, February 27, 2010

DIY Spring Nest Wreath

Ever since I took down the lackluster little red heart shaped wreath after Valentine's Day, my front entrance has felt a little BORING. Not to mention I put away the grapevine reindeer, and it's pretty much time to send those potted mini trees into storage as well.  I have to admit that coming home to a cheerful little wreath upon my door makes me smile everytime. 

Unfortunately, the Easter wreath my mother in law got me a few years back had gotten damaged in our first move, and since I wasn't much of a wreath person back then, I chucked it without bothering to try and fix it!  Regretting that now...

So I went perusing blogland for some inspiration, and found two that I am absolutely in love with and totally want to create my own versions of!


This first one, was exactly what I was envisioning, but 100 times better!!  I knew I wanted to use a grapevine form again, and wanted something with birds/eggs/nests.  Living with Lindsay created this gorgeous version of someone else's wreath and I think it turned out lovely!!  Exactly what I want to do!

It reminds me a little of this Good Housekeeping wreath I saved a while back.  Love the pussywillows!!

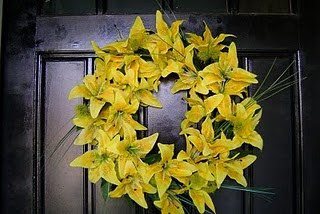
Then, a surpise when I fell in love with this sunny wreath created by Amy over at Design-Aholic.   Even better that it's pretty inexpensive to make.  I've yet to decide on my flower choice, but this one will be bringing me into summer, I'm sure!  Plus, it really has me missing my old dark brown front door... sigh!

Anyhow, I've started my first of the wreath projects today, but I'm not finished, so stay tuned later this week for the reveal.  Thanks ladies for such great inspiration!

Thursday, February 25, 2010

Going back in time....

Or at least that's how I feel.  You see, I haven't had photos developed since I got my first digital camera.... and let's just say it's been a handful of years.... whoops!

(this photo circa Nov 2006)

Yet, since we lived in the last place, I've had a desire to get some neat frames up!  Including a gorgeous collage frame from  Umbra  we got as a housewarming present that would be prefect with some black and white beauties!

So I did some research as to the best photo prices, and looks like Costco has the best bang for our buck right now.  So I have the painstacking task of going through a few years of photos on my computer, picking our my absolute favorites, and all others that are worthy of a photo ambum/scrapbook page/frame and downloading them into appropriate albums.

I will say that I am always smart enough to sort them into folders on my desktop, and properly label them when I download them, so that saves time!  But I don't mind having something to do since Cory  has been slaving away all week working 14 plus hour days....

I guess in the meantime, I will keep myself company, dreaming about being back here again!

Enjoy!

Tuesday, February 23, 2010

Bamboo Lovelies

Okay, I have to admit I did a little stalking last week! Yeah, during my regular Kijiji  browsing, I came across a pair of black lacquered bamboo tables/stools.  The price was reasonable, but I talked myself out of them, as we really don't need them.  Cory would be so mad if I bought them, I thought....

Yet, I checked their listing daily....

Imagine my surprise and delight to see them further reduced on Saturday evening before bed.  I quickly sent the owner an email asking their dimensions.  You know, I had no intentions of buying, but I just wanted to know, if the potential owner would be easily able to find cushions for the top.

They were a nice size, perfect height, wide enough to sit on, or accomodate a tray.  Oh good, the person who bought them would be lucky....

Later than afternoon I called and asked if they were still available!  I drove all the way to the other side of the city to pick them up.  They are chipped in a few spots, which is fine cause I plan on re-painting.

There is a tiny piece that is broken, that I am sure I can fix no problem.  Although, I will admit I almost walked away.  But I've loved bamboo for a while...plus I asked for a lower price.

For now, they are in the back of my car.  It'll be a while before they are ready for their AFTER photos.  I plan on painting them when the weather is warmer, and I want to find some cushions, if not make some.  I promise to post the photos when they are finished